Tag Archives: Travel

RV Set Up Procedure: How to Properly & Easily Set Up A Travel Trailer at a Campsite

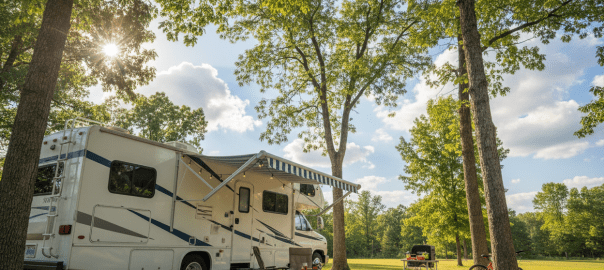
Arriving at a campsite after a long drive is one of the best feelings in the world — but only if your setup goes smoothly. Whether you’re a first-timer or just looking to sharpen your routine, this step-by-step guide will walk you through how to properly set up a travel trailer at a campsite quickly and confidently.

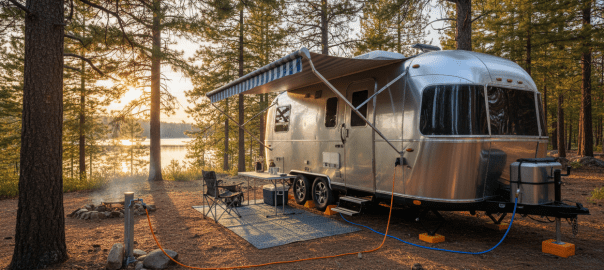
Step 1: Choose and Pull Into Your Site

Before unhitching, take a moment to survey your campsite. Look for a level spot, note where the hookups are (water, electric, sewer), and plan your pull-in angle. Back in slowly — use a spotter if you have one — and position your trailer so the door faces away from the sun or toward your preferred view.

Pro tip: Use your tow vehicle’s backup camera and take it slow. A few extra minutes here saves a lot of frustration later.

Step 2: Chock Your Wheels

Before you do anything else, place wheel chocks on both sides of your tires to prevent any rolling. This is a critical safety step — don’t skip it.

Step 3: Level Your Trailer

A level trailer is essential for comfort, appliance performance (especially the refrigerator), and slide-out operation. Use a bubble level or a leveling app on your phone.

  • Side-to-side: Use leveling blocks or ramps under the low-side tires.
  • Front-to-back: Adjust your tongue jack up or down until level.

Most modern travel trailers have a built-in level indicator — check your owner’s manual for its location.

Step 4: Unhitch from Your Tow Vehicle

Once level and chocked, you can safely unhitch:

  1. Lower the tongue jack until it takes the weight off the hitch ball.
  2. Disconnect the safety chains, brake controller plug, and trailer wiring harness.
  3. Release the hitch coupler and lift it off the ball.
  4. Raise the tongue jack fully and pull your tow vehicle forward.

Step 5: Deploy the Stabilizer Jacks

Stabilizer jacks (at the four corners of your trailer) reduce movement and sway when you’re inside. Lower them until they make firm contact with the ground — but don’t use them to level the trailer. That’s what leveling blocks are for.

Step 6: Connect to Shore Power

Plug your 30-amp or 50-amp power cord into the campsite’s electrical pedestal. Make sure the breaker is off before plugging in, then flip it on. Check inside that your outlets and appliances are working.

Note: Always use a surge protector to protect your RV’s electrical system from power fluctuations.

Step 7: Hook Up Water

  1. Attach a drinking-water-safe hose to the campsite’s water spigot.
  2. Connect the other end to your trailer’s city water inlet.
  3. Turn on the spigot slowly and check for leaks at both connections.

Pro tip: Use an inline water pressure regulator (set to 40–60 PSI) to protect your trailer’s plumbing from high campground water pressure.

Step 8: Set Up Sewer (If Full Hookup)

If your site has a sewer connection:

  1. Connect your sewer hose to the trailer’s drain outlet.
  2. Place the other end securely in the campsite’s sewer inlet.
  3. Keep your black tank valve closed until it’s at least two-thirds full — this prevents pyramid plugs.
  4. You can leave the gray tank valve open to drain continuously.

Step 9: Extend Your Awning & Slide-Outs

With utilities connected and the trailer stable, extend your slide-outs (if equipped) and deploy your awning. Make sure there are no obstructions — tree branches, neighboring rigs, or uneven ground — before extending.

Step 10: Final Walkthrough

Do a quick interior and exterior check:

  • Refrigerator switched to electric mode and cooling
  • Water heater on (electric or propane)
  • Propane tanks open (if using gas appliances)
  • Smoke and CO detectors functioning
  • All windows and vents opened for airflow

You’re Set Up — Now Enjoy It!

A solid setup routine becomes second nature after a few trips. The key is consistency — do it in the same order every time and you’ll be set up in under 30 minutes. Now kick back, pour a cold drink, and enjoy the outdoors.

Need gear to make your setup easier? Browse our RV accessories collection for leveling blocks, surge protectors, water pressure regulators, and more.
RV Pre-Purchase Inspection: Why It’s the Smartest Investment Before You Buy

Buying an RV is one of the most exciting purchases you’ll ever make — and one of the most expensive. Whether you’re eyeing a gently used travel trailer or a brand-new Class A motorhome, there’s one step too many buyers skip that can cost them dearly down the road: a professional RV pre-purchase inspection (PPI).

At My RV Guy, we’ve seen it all — hidden water damage, faulty electrical systems, and structural issues that weren’t visible during a casual walkthrough. A thorough inspection before you sign on the dotted line isn’t just smart; it’s essential.

What Is an RV Pre-Purchase Inspection?

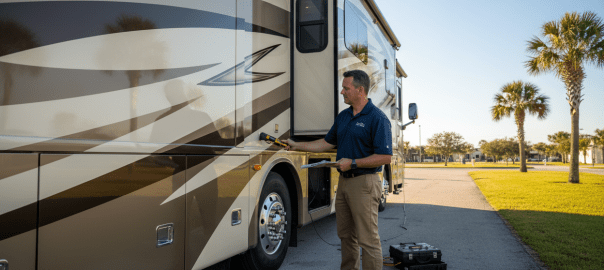
An RV pre-purchase inspection is a comprehensive evaluation of an RV’s mechanical, structural, electrical, plumbing, and safety systems — performed by a certified, independent inspector before the sale is finalized. Unlike a quick dealer walkthrough, a PPI is an objective, detailed assessment designed to protect you, the buyer.

Inspections typically take 3–5 hours and cover dozens of systems and components. A qualified inspector will provide a written report with photos, findings, and recommended repairs.

Why You Need One — Even on a New RV

Many buyers assume a new RV doesn’t need an inspection. This is one of the most common — and costly — misconceptions in the RV world.

RVs are not built like cars. They’re assembled by hand in large factories, and quality control varies significantly by manufacturer. Industry data consistently shows that new RVs frequently leave the factory with defects, including:

  • Improperly sealed roof seams and slide-outs
  • Loose or missing fasteners in cabinetry and flooring
  • Incorrectly wired electrical systems
  • Appliances that were never tested or calibrated
  • Plumbing connections that weren’t fully tightened

A pre-purchase inspection on a new unit ensures that warranty-covered defects are documented before you take ownership — giving you leverage to have the dealer correct issues at no cost to you.

Common Problems Found During an RV Inspection

Water Damage & Roof Leaks

The #1 issue found in used RVs. Water intrusion is often invisible to the untrained eye but can cause catastrophic structural damage over time. Inspectors use moisture meters to detect hidden damage behind walls, under flooring, and around slide-out seals. Repairs can range from $500 to $10,000+ depending on severity.

Electrical System Failures

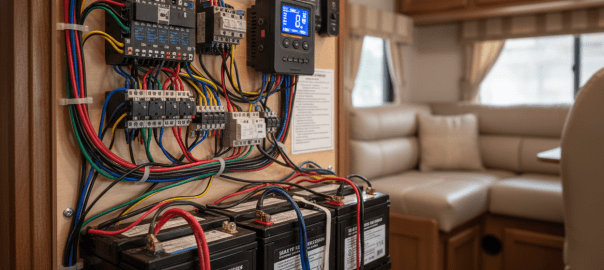
From faulty 30/50-amp shore power connections to improperly wired inverters and battery systems, electrical problems are both dangerous and expensive. An inspector will test all outlets, lighting, the converter/charger, and any solar or generator systems.

Mechanical & Engine Issues (Motorhomes)

For Class A, B, and C motorhomes, the engine, transmission, brakes, tires, and chassis are all evaluated. A pre-purchase inspection can reveal deferred maintenance, oil leaks, brake wear, or suspension issues that a seller may not disclose.

Plumbing & Water Systems

Inspectors check fresh, gray, and black water tanks, water heaters, pumps, and all supply lines. Cracked tanks, failing water heaters, and leaking connections are common findings — especially in RVs that have been winterized improperly.

HVAC Systems

Air conditioners, furnaces, and refrigerators are tested for proper operation. A failed rooftop AC unit alone can cost $800–$1,500 to replace.

Structural & Frame Integrity

Soft spots in the floor, delamination on sidewalls, and frame rust or cracks are serious structural concerns. These are often signs of long-term neglect or prior accident damage that may not appear on a vehicle history report.

Safety Systems

Smoke detectors, carbon monoxide detectors, LP gas detectors, and fire extinguishers are all checked for proper function and expiration dates — critical for life safety on the road.

How a Pre-Purchase Inspection Saves You Money

The math is simple. A professional RV inspection typically costs $300–$600. Compare that to common repair costs:

  • Roof leak / water damage: $1,500 – $10,000+
  • Slide-out motor replacement: $500 – $2,000
  • Rooftop AC replacement: $800 – $1,500
  • Engine repair (motorhome): $1,000 – $5,000+
  • Delamination repair: $2,000 – $8,000
  • Plumbing overhaul: $500 – $3,000

A single uncovered issue can cost 5–20x the price of the inspection itself. Beyond avoiding repair costs, a detailed inspection report gives you powerful negotiating leverage — many buyers use findings to negotiate thousands off the purchase price or require the seller to make repairs before closing.

What to Look for in a Qualified RV Inspector

Not all inspectors are created equal. Look for:

  • NAIRVT Certification — The National Association of Independent RV Technicians sets the standard for training and ethics
  • Experience with your RV type — Towables and motorhomes have very different systems
  • Independence — Your inspector should have no financial relationship with the seller or dealership
  • A detailed written report — With photos, findings, and repair recommendations

The Bottom Line

Whether you’re buying new or used, a pre-purchase RV inspection is the single best investment you can make before handing over your hard-earned money. It protects you from hidden defects, gives you negotiating power, and ensures your first trip in your new RV is a celebration — not a repair bill.

At My RV Guy, we’re passionate about helping RV owners make informed decisions. From quality parts and accessories to expert advice, we’re here to keep you rolling with confidence.

Have questions about RV maintenance, parts, or inspections? Browse our catalog or reach out to our team — we’re here to help.

RV Electrical for Beginners: Everything You Need to Know

One of the most intimidating aspects of RV ownership for newcomers is the electrical system. Wires, batteries, inverters, shore power — it can feel overwhelming. But once you understand the basics, it all starts to make sense. This guide breaks down RV electrical systems in plain English so you can camp smarter and troubleshoot with confidence.

The Two Electrical Systems in Your RV

Every RV has two separate electrical systems that work together:

  • 12-volt DC system — powered by your batteries, this runs lights, fans, water pump, slides, and most built-in appliances when you’re off-grid.
  • 120-volt AC system — the same type of power as your home, this runs your air conditioner, microwave, outlets, and other high-draw appliances. It requires shore power, a generator, or an inverter.

Understanding which system powers which appliance is the first step to mastering your RV’s electrical setup.

Shore Power (Campground Hookups)

When you plug into a campground pedestal, you’re connecting to shore power — standard AC electricity. Most RVs use either a 30-amp or 50-amp connection:

  • 30-amp: One 120V hot leg, up to 3,600 watts total. Common on smaller trailers and Class C motorhomes.
  • 50-amp: Two 120V hot legs, up to 12,000 watts total. Standard on larger Class A motorhomes and fifth wheels with dual AC units.

You can use adapters (“dogbone adapters”) to connect a 50-amp RV to a 30-amp pedestal or vice versa, but be aware of the power limitations when doing so.

RV Batteries: Your Off-Grid Power Bank

Your house batteries store energy for use when you’re not plugged in. There are three main types:

  • Lead-acid (flooded): The traditional, affordable option. Requires regular water top-offs and venting. Usable capacity is about 50% of rated amp-hours.
  • AGM (Absorbed Glass Mat): Sealed, maintenance-free, and more vibration-resistant. Still limited to about 50% depth of discharge.
  • Lithium (LiFePO4): The premium choice. Usable capacity is 80–100%, lighter weight, longer lifespan, and faster charging. Higher upfront cost but often worth it for frequent campers.

Battery capacity is measured in amp-hours (Ah). A 100Ah battery can theoretically supply 10 amps for 10 hours — though real-world usage varies based on battery type and discharge rate.

Understanding Amp-Hours and Power Draw

To figure out how long your batteries will last, you need to know how much power your appliances draw. Here are some common examples:

  • LED lights: 1–2 amps each
  • Roof vent fan: 2–4 amps
  • Water pump: 4–7 amps (while running)
  • 12V refrigerator: 3–6 amps average
  • Furnace blower: 6–12 amps
  • Laptop charging: 3–5 amps

Add up your expected daily usage to estimate how many amp-hours you’ll need and size your battery bank accordingly.

Converters vs. Inverters — What’s the Difference?

These two devices are often confused but do opposite jobs:

  • Converter: Converts AC shore power into DC to charge your batteries and run 12V systems. Almost every RV has one built in.
  • Inverter: Converts DC battery power into AC so you can run 120V appliances (like a microwave or TV) without being plugged in. This is an optional upgrade that’s popular for boondockers.

Many modern RVs come with a inverter/charger combo unit that handles both functions seamlessly.

Solar Power: Free Energy from the Sun

Solar panels are one of the most popular upgrades for RVers who love off-grid camping. Here’s how a basic solar setup works:

  1. Solar panels collect sunlight and generate DC electricity.
  2. A charge controller (MPPT or PWM) regulates the power flowing into your batteries to prevent overcharging.
  3. Power is stored in your house batteries for use anytime.
  4. An inverter (if installed) converts that stored power to AC for high-draw appliances.

A basic starter solar setup of 200–400 watts is enough to maintain batteries and run lights, fans, and devices. Serious boondockers often run 600W–1,200W or more.

Generators: On-Demand Power Anywhere

A generator produces AC power on demand, making it ideal for running your air conditioner or other high-draw appliances when you’re off-grid. Key things to know:

  • Built-in (onboard) generators are common on Class A and Class C motorhomes.
  • Portable generators are popular with trailer owners — look for “inverter generators” which run quieter and are safer for electronics.
  • Always run generators outside and never inside an enclosed space due to carbon monoxide risk.
  • Check campground rules — many have quiet hours that restrict generator use.

Common RV Electrical Problems and Quick Fixes

Even with a solid understanding of your system, issues come up. Here are the most common ones:

  • Tripped breaker: Check your breaker panel (usually inside the RV) and the campground pedestal breaker. Reset and reduce your load.
  • Dead batteries: Check connections for corrosion, test voltage with a multimeter (fully charged 12V battery = ~12.6V), and check if your converter is working.
  • No power at outlets: Check GFCI outlets — one tripped GFCI can cut power to multiple outlets. Press the reset button on the GFCI outlet.
  • Low voltage at the pedestal: Use a surge protector with voltage monitoring. Low voltage (under 105V) can damage appliances and AC units.

Essential Electrical Accessories Every RVer Should Have

  • Surge protector / EMS (Electrical Management System): Protects your RV from power surges, low voltage, and wiring faults at campgrounds. A must-have.
  • Multimeter: Inexpensive and invaluable for diagnosing battery and wiring issues.
  • Dogbone adapters: 30-to-50 amp and 50-to-30 amp adapters for campground flexibility.
  • Extension cord (30A or 50A rated): For sites where the pedestal is far from your hookup.
  • Battery monitor: Shows real-time state of charge, voltage, and amp draw so you always know your power status.

Safety First

RV electrical systems carry real risks if mishandled. Always follow these safety rules:

  • Never work on live wiring — disconnect shore power and disconnect batteries before any electrical work.
  • Install a carbon monoxide detector and smoke alarm in your RV.
  • Use a surge protector every time you plug into shore power.
  • If you’re unsure about a repair, consult a certified RV technician.

You’ve Got This!

RV electrical systems aren’t as scary as they seem once you break them down into their basic components. Start by understanding what’s in your rig, learn your power needs, and invest in a few key accessories like a surge protector and battery monitor. From there, you’ll be well on your way to confident, comfortable camping — whether you’re plugged in at a full-hookup site or parked under the stars miles from the nearest outlet.

Have questions about your RV’s electrical system? Contact our team — we’re here to help!

20 Ways to Keep Your RV Cool This Summer

Summer is the peak season for RV adventures — but it can also turn your rig into a rolling oven. Whether you’re parked at a full-hookup campsite or boondocking in the desert, keeping your RV cool is essential for comfort and safety. Here are 20 practical hacks to beat the heat this summer.

1. Park in the Shade

It sounds simple, but strategic parking makes a huge difference. Position your RV so the largest windows and slide-outs face away from direct sunlight. Trees, buildings, or natural terrain can provide valuable shade.

2. Use Reflective Window Covers

Reflective sunshades or foil inserts on your windows block solar heat before it enters the RV. They’re inexpensive, easy to store, and can drop interior temps by 10–15°F.

3. Install Thermal or Blackout Curtains

Upgrade your standard curtains to thermal or blackout versions. These block radiant heat and UV rays while also giving you privacy — a win-win for summer camping.

4. Vent Your Roof Fans Strategically

Run your roof vent fans in exhaust mode during the hottest part of the day to push hot air out. At night, switch to intake mode to pull in cooler outside air.

5. Add a Vent Fan Cover

Vent covers (like the Maxxair or Fan-Tastic brands) let you keep your roof vents open even during rain, allowing airflow 24/7 without worrying about water intrusion.

6. Use an Awning

Deploy your awning on the sunny side of your RV to create shade over windows and the entry door. This can significantly reduce heat gain on that side of the rig.

7. Cook Outside

Using your stovetop or oven inside adds heat and humidity to your RV. Fire up a portable grill or camp stove outside to keep cooking heat out of your living space.

8. Run Your AC Efficiently

Pre-cool your RV before the hottest part of the day (typically 2–5 PM). Set your thermostat to a consistent temperature rather than cranking it up and down, which wastes energy and strains the unit.

9. Insulate Your Roof

If you’re handy, adding reflective insulation or Thinsulate to your ceiling can dramatically reduce heat transfer from the roof — one of the biggest sources of heat gain in an RV.

10. Use a Portable Evaporative Cooler

In low-humidity climates (like the Southwest), a portable swamp cooler can be a cost-effective supplement to your AC. They use far less electricity and work great when humidity is below 50%.

11. Seal Air Leaks

Check around windows, doors, slide-outs, and roof vents for gaps. Use weatherstripping or self-leveling lap sealant to close leaks that let hot air in and cool air out.

12. Add Insulated Skirting

Skirting around the base of your RV isn’t just for winter — it also keeps hot ground-level air from heating your underbelly and floors in summer.

13. Use a Portable Fan

A small battery-powered or USB fan can make a big difference in personal comfort, especially at night. Position it to create cross-ventilation by drawing air across your body.

14. Keep Vents and Registers Clear

Make sure furniture, bedding, and gear aren’t blocking your AC vents or return air registers. Blocked airflow forces your AC to work harder and cool less effectively.

15. Use LED Lighting

Incandescent and halogen bulbs generate significant heat. Switching to LED bulbs throughout your RV reduces heat output and saves battery power — especially important when boondocking.

16. Hydrate and Use Cooling Towels

Personal cooling matters too. Keep a spray bottle of water in the fridge, use cooling towels, and stay well-hydrated. Sometimes the best hack is taking care of yourself, not just the RV.

17. Park Nose-In or Tail-In Based on Sun Direction

Orient your RV so the smallest profile faces the sun. Many RVers find that parking with the rear toward the afternoon sun minimizes heat gain through the large rear windows.

18. Use a Portable Misting System

Attach a misting kit to your awning to create an outdoor cool zone. Misters can drop ambient temperatures by 20°F or more, making your outdoor living space much more enjoyable.

19. Travel During Cooler Hours

If you’re on the move, try to drive in the early morning or evening. This reduces the heat load on your RV while driving and means you arrive at your destination during cooler parts of the day.

20. Service Your AC Before Summer

A well-maintained AC unit cools more efficiently. Clean or replace filters, check refrigerant levels, and inspect the shroud and coils before the summer heat hits. A little preventive maintenance goes a long way.

Stay Cool Out There!

Keeping your RV cool doesn’t have to mean running your AC 24/7. A combination of smart parking, insulation upgrades, ventilation strategies, and a few affordable accessories can make a huge difference in your summer comfort. Have a tip we missed? Drop it in the comments — we’d love to hear what works for your rig!

Getting Your RV Ready for Camping Season: Essential Prep Checklist

Spring is just around the corner, and that means it’s time to shake off the winter dust and get your RV ready for adventure. Whether you’re a seasoned road warrior or planning your first trip of the year, proper preparation ensures a safe, comfortable camping season ahead.

Start with a Thorough Inspection

Before you hit the road, walk around your RV and check for any damage that may have occurred during storage. Look for cracks in seals, damaged awnings, or tire wear. Check your roof for any signs of water damage or deterioration in the sealant around vents and skylights.

Essential Systems Check

Your RV’s critical systems need attention after sitting idle. Test your water pump, check for leaks in water lines, and sanitize your fresh water tank. Inspect your propane system for leaks and ensure all appliances are functioning properly. Don’t forget to check your battery charge and connections—corroded terminals can leave you stranded.

Tire Safety Matters

Tires are one of the most overlooked yet critical components. Check tire pressure when they’re cold, inspect for cracks or bulges, and verify the tread depth. Remember, RV tires age out even with low mileage, so check those date codes.

Interior Refresh

Open windows and air out your RV to eliminate any musty odors. Check for signs of moisture or pest intrusion. Test all lights, outlets, and entertainment systems. Restock your emergency kit, first aid supplies, and any camping essentials you may have depleted last season.

Exterior Maintenance

Clean and inspect your awning, lubricate slide-out mechanisms, and check all exterior lights and turn signals. A good wash and wax not only makes your RV look great but protects the finish from UV damage and road grime.

Create Your Pre-Trip Checklist

Develop a routine checklist you can use before every trip. Include items like checking fluid levels, testing brakes, verifying hitch connections, and ensuring all safety equipment is accessible.

Taking the time now to properly prepare your RV means more time enjoying the open road and less time dealing with preventable issues. Here’s to a fantastic camping season ahead!

Robins Hollow

One day I went to Holiday Acres as a quest of a friend. He wanted to show me his new site and camper. Afterwards, we walked down to the pond to do some fishing. Not much was happening while fishing from shore. I noticed a canoe and asked if we could take it out and fish from it. There is never much in the middle of the pond, unless you’re fishing for bullhead. Casting into the shore is how I’ve always caught bass. He said, “No, I catch more from the shore.” Some time went by and I asked again. He adamantly rejected my request. I could tell something else was at play.

Eventually he told me the story of the last time he went out in the canoe. On the way back to camp the wind had picked up significantly. The harder it blew towards him the harder he paddled. The harder he paddled the further the front of the canoe went out of the water. The battle persisted for awhile until the wind won and flipped him over in the canoe. He was now afraid to go out on the pond.

What he didn’t realize was he could have just put the paddle down and let the wind take him to the calmer water. Then he could have just paddled gently back to camp by following the shoreline. Robins Hollow is not that big of a pond.

I tell this story because sometimes we get so caught up in getting things done our way, we forget there may be a better way. Instead of fighting the wind he should have worked with it to get back home. We all have experienced this in our lives at one time or another. It could have been in business, in a relationship, or in a number of other areas of our lives. Fighting against adversity is good, but knowing when to put the paddle down it better. Maybe it was God telling my friend, “I have a better way!”

RV Maintenance Checklist for Every Season: Keep Your RV Road-Ready Year-Round

Regular RV maintenance is the key to avoiding breakdowns, extending your RV’s lifespan, and ensuring safe travels. Use this comprehensive seasonal maintenance checklist to keep your RV in top condition throughout the year.

Spring Maintenance Checklist

Spring is the perfect time to prepare your RV for the camping season ahead, especially if you’ve had it in winter storage.

Exterior Inspection

Walk around your RV and inspect the roof, sidewalls, and undercarriage for any damage that may have occurred during winter. Check all seals around windows, doors, and roof vents. Our Roof & Sealing collection has everything you need for repairs.

Plumbing System

If you winterized, flush the antifreeze from your system and sanitize your fresh water tank. Check for leaks in all faucets, connections, and the water heater. Replace any worn parts from our Plumbing & Water Systems section.

Electrical System

Test all lights, outlets, and appliances. Check your battery charge and clean terminals. Inspect your power cord for damage. Browse our Electrical & Lighting collection for replacements.

Tires and Wheels

Check tire pressure, inspect for cracks or wear, and verify proper lug nut torque. Don’t forget your spare tire!

Summer Maintenance Checklist

Summer heat puts extra stress on your RV systems, so regular checks are essential.

Cooling Systems

Clean or replace your air conditioner filters monthly during heavy use. Check refrigerator vents and ensure proper cooling. Find maintenance supplies in our Heating & Cooling collection.

Awning Care

Inspect your awning fabric for tears, clean it regularly, and lubricate moving parts. Check our Awnings & Exterior section for cleaning products and replacement parts.

Holding Tanks

With increased use, monitor your holding tanks closely. Use quality tank treatments to prevent odors and buildup. Shop our Sanitation & Waste collection.

Generator Maintenance

If you have a generator, change the oil, check the air filter, and run it under load monthly to keep it in good condition.

Fall Maintenance Checklist

As camping season winds down, prepare your RV for cooler weather or storage.

Heating System

Test your furnace before you need it. Clean or replace filters and check for proper operation. Our Heating & Cooling products include furnace parts and accessories.

Weatherproofing

Inspect and replace worn weatherstripping around doors and windows. Check all seals and caulking before winter weather arrives.

Appliance Check

Test all appliances including your water heater, stove, and oven. Replace any faulty components from our Appliances & Kitchen collection.

Safety Equipment

Test smoke detectors, carbon monoxide detectors, and fire extinguishers. Replace batteries and expired equipment. Visit our Emergency & Safety section.

Winter Maintenance Checklist

Whether you’re storing your RV or winter camping, proper maintenance is crucial.

For Storage

Follow proper winterization procedures (see our complete winterization guide). Cover your RV if possible and check on it periodically throughout winter.

For Winter Camping

Insulate water lines, use heated hoses, and keep cabinet doors open during freezing temperatures. Stock up on winter camping essentials.

Battery Maintenance

Keep batteries charged during storage or maintain them with a quality battery maintainer. Find battery care products in our Electrical & Lighting collection.

Year-Round Maintenance Tasks

Monthly Tasks

  • Check tire pressure and condition
  • Test all lights and signals
  • Inspect for leaks (water and propane)
  • Clean or replace air filters
  • Check battery water levels (if applicable)

Every Trip

  • Check tire pressure when cold
  • Inspect hitch and safety chains
  • Test brakes and brake controller
  • Verify all lights work
  • Check propane levels

Annual Tasks

  • Professional inspection of roof and seals
  • Wheel bearing inspection and repack
  • Brake inspection and adjustment
  • Water heater anode rod replacement
  • Deep clean and wax exterior

Keep Maintenance Supplies on Hand

Stock your RV with essential maintenance and repair supplies. Our Maintenance & Repair collection has everything you need including sealants, lubricants, cleaners, and tools.

Don’t Forget the Hardware

Keep a well-stocked supply of common fasteners, screws, and hardware for quick repairs. Browse our Hardware & Fasteners collection.

Upgrade While You Maintain

Maintenance time is also a great opportunity to upgrade your RV. Check out our Upgrades & Accessories collection for LED lighting, solar panels, and other improvements.

Final Thoughts

Regular maintenance might seem like a chore, but it’s far less expensive and stressful than dealing with breakdowns on the road. Create a maintenance log to track what you’ve done and when, and you’ll enjoy worry-free RVing for years to come.

Need parts or supplies for your seasonal maintenance? Browse our complete selection organized by category to find exactly what you need. Happy RVing!

Demand is shifting toward mobile RV repair!

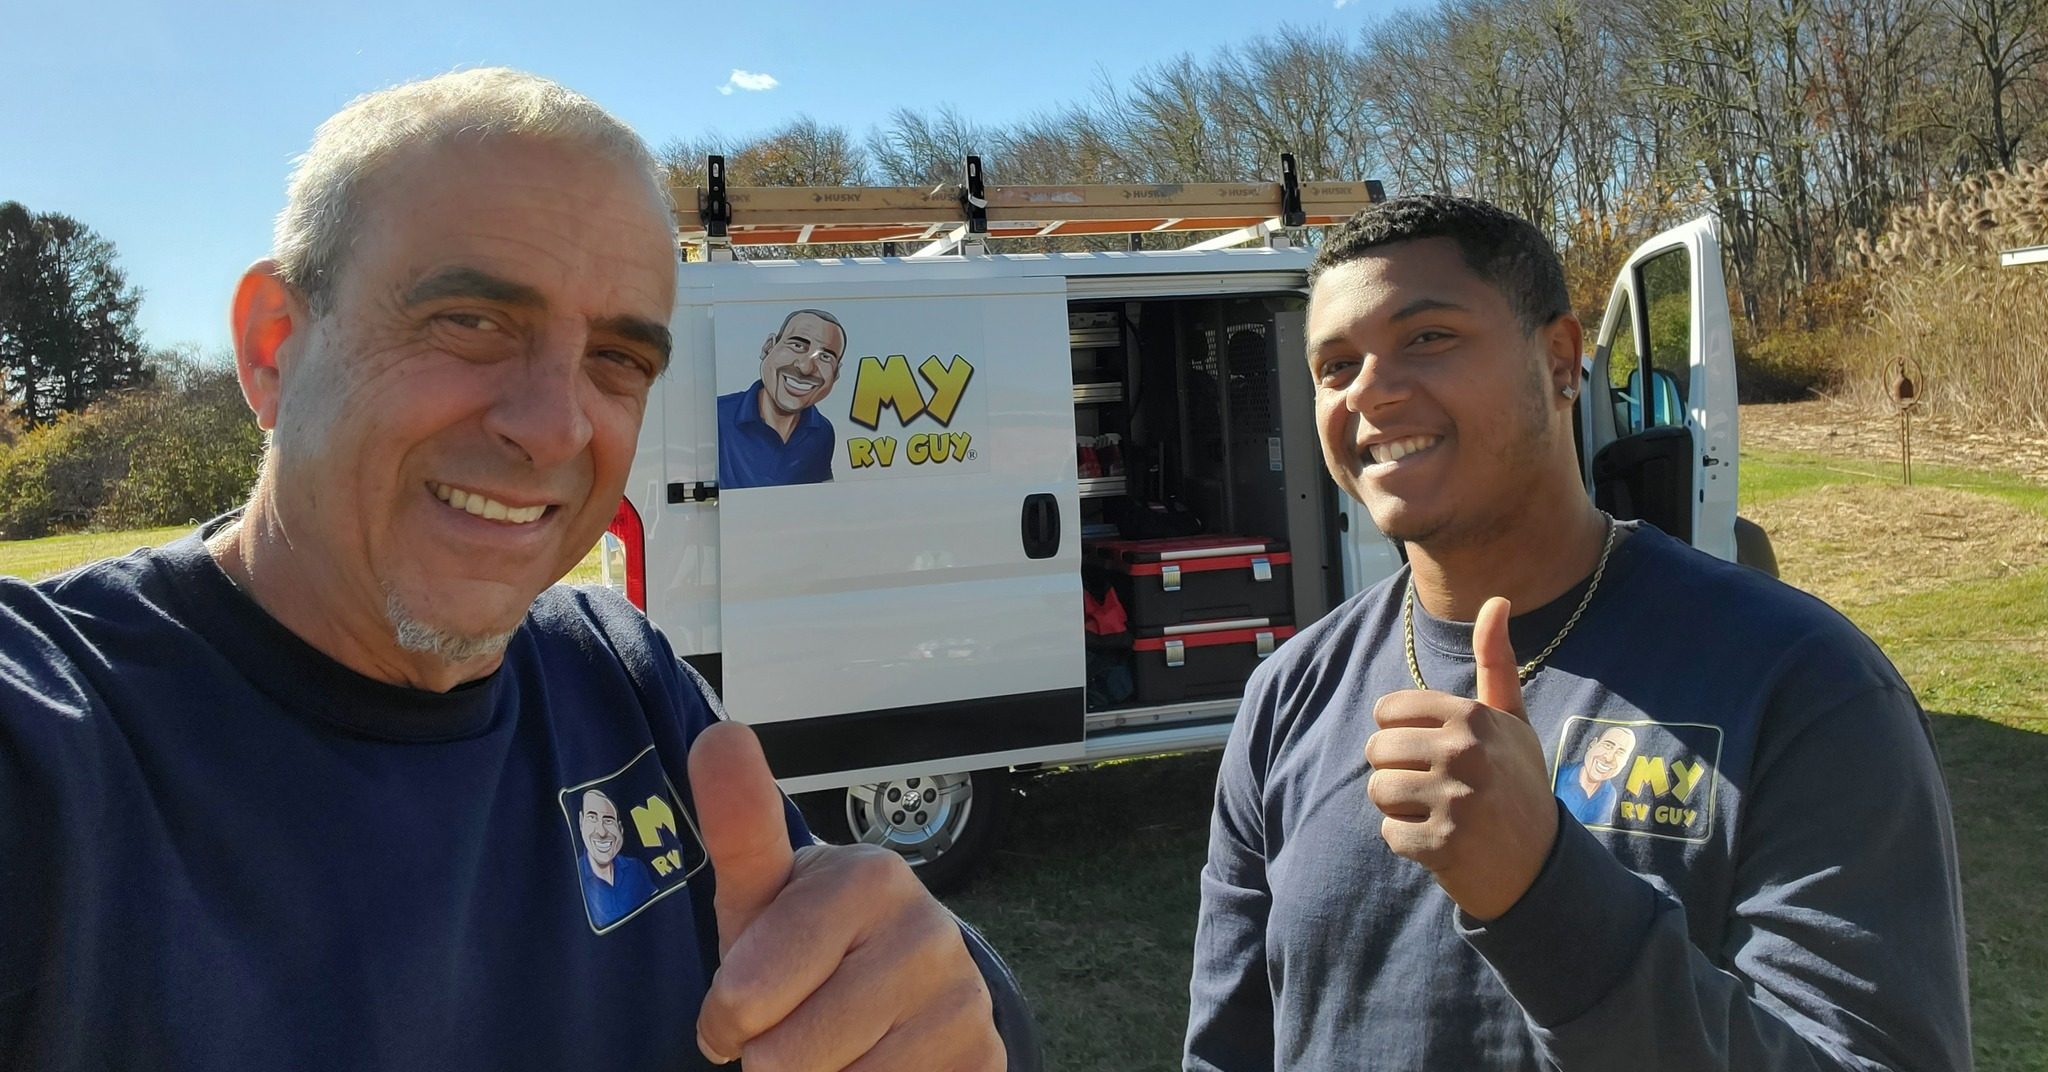
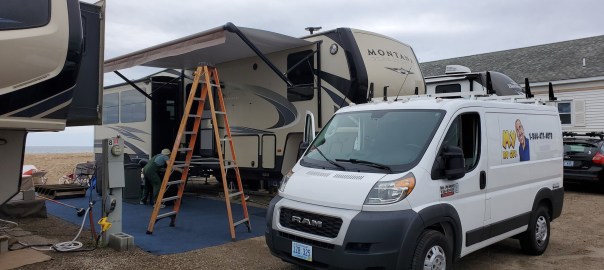
My RV Guy is the leading mobile RV repair franchise offering on-site maintenance, inspections, and repair services. The demand for RV technicians will stay exceptionally high through 2026. This is driven by a growing, tech-integrated RV fleet. Additionally, aging technicians are retiring. There is also a rebound in industry shipments to the middle three hundred thousands unit range. The industry is experiencing a critical shortage. Trained technicians are essential for dealerships. They are also highly sought after by mobile repair services. 

2026 Demand & Industry Forecast 

  • High Demand for Skills: The need for skilled RV service technicians is persistent across the U.S. due to aging workers leaving the field and increased, complex, tech-integrated rigs requiring specialized maintenance.
  • Industry Growth: Wholesale RV shipments are projected to reach approximately 349,300 units in 2026, a 2.8% increase from 2025, signifying continued demand for service.
  • Service Bottleneck: A shortage of technicians continues to create a bottleneck, as service departments struggle to meet the demand from a growing number of users. 

Key 2026 Trends Affecting Technician Demand

  • Mobile Service Growth: Demand is shifting toward mobile RV repair, with businesses planning to increase service loads to meet high utilization, signaling a need for more technicians.
  • Demographic Shift: With Millennials and Gen Z representing over 60% of new campers, there is a higher demand for technicians capable of repairing advanced, technology-heavy rigs.
  • Repair Speed Improvements: While demand is high, industry improvements have reduced warranty repair times, allowing technicians to turn around units faster, yet the need for more, faster service remains. 

New RV Shipments Up Again in 2025!

Total RV shipments ended December 2025 with 23,220 units, a 0.3% growth rate compared to the 23,153 units shipped in December 2024. For the 2025 year, RV shipment totaled 342,220 units, a 2.5% growth rate from the prior year’s total.

Towable RVs, led by conventional travel trailers, ended the month down (-1.9%) from last December with 20,425 shipments. Motorhomes finished the month up 19.5% compared to the same month last year with 2,795 units. For the year, Towable RVs finished at 306,191 units, up 2.5%, and Motorhomes totaled 36,029 up 3.3%.

Park Model RVs finished December up 22.0% compared to the same month last year, with 333 wholesale shipments. Park Model RVs ended the year with 4,305 units, up 9.6% over last year’s total.

Key Aspects of the My RV Guy Franchise:

  • Business Model: Owner-operated, focused on providing high-quality, honest service.
  • Services: Covers a wide range of needs, including repairs, maintenance, and insurance estimates.
  • Investment: The total investment typically ranges between $70,000 and $120,000, with a franchise fee of $30,000.
  • Support: Offers ongoing business support, brand recognition, and a proven system to help owners succeed.
  • Ideal Candidates: Self-motivated individuals who are mechanically inclined.
  • Veteran Discount: A 10% discount on the franchise fee is available for veterans. 

For more information, visit the My RV Guy franchise website and the My RV Guy retail website

Listen Now. Ron Ash describes a My RV Guy franchise opportunity with Greg Gerber. This is all on Episode 317 of The Workamper Show Podcast.

Keep the Good Times and Revenue Rolling with a My RV Guy® Franchise!

Friends,

I hope all is well. The mobile RV repair business had another record year. My RV Guy® sales were almost double of the prior year. Manufacturers have been producing poor quality units and relying on us to fix the issues via warranty repair and replacement onsite. It’s great for our business, but not so good for the RV buyer. Hopefully manufacturers will step up their quality control moving forward.

We’ve started another year of franchising our highly efficient, lucrative, and technologically advanced business model. For the right candidates, it’s the best way to start, grow and profit in the RV industry. Buying a franchise or proven business opportunity eliminates all the hard work of opening a business independently and will help you avoid much of the risk of starting a new business. Even if you currently own a mobile RV repair business, you’ll enjoy higher profits and happier customers with the resources and training available as one of our franchisees. Take control of your future, increase your income, find your path to a better lifestyle with a My RV Guy® franchise.

Best regards,

Ron Ash, Franchiser

Listen Now to my interview with Greg Gerber on the Workamper Show to learn if owning a MY RV Guy® franchise is right for you.


We’ve Got You Covered!

  • Marketing– We’ll utilize our extensive marketing expertise to coordinate the development of advertising materials and SEO/SEM strategies to help franchisees leverage our established brand.
  • Operational – My RV Guy will provide ongoing training and support in many areas, including technology and software training, product ordering, customer-service techniques, accounting and administration.
  • Ongoing Research & Development – My RV Guy leadership will continue to research methods and techniques for franchise operations that enhance unit-level profitability.
  • Financing – With some basic information from you, our system will pull a “SOFT” credit report that does NOT affect your credit scores or trigger an inquiry. This Credit Score and Income information is then calculated using our affordability program to maximize funding capability and will show us how much you qualify for using multiple different types of funding solutions! We use this data to arrange, negotiate and close multiple loans, therefore giving you the ability to have multiple options and give you the total amount of funding you need! A funding Consultant will contact you within 24 business hours to discuss your pre-approval and next steps. Apply Now!

That Collection of Moments

Here we are at the beginning of August 2025. It’s been a wild ride full of great music, activities and so much more. August 7th is the astronomical midpoint of summer, as a New Englander it always feels that way to me. So, we are only a few days into summertime halftime.

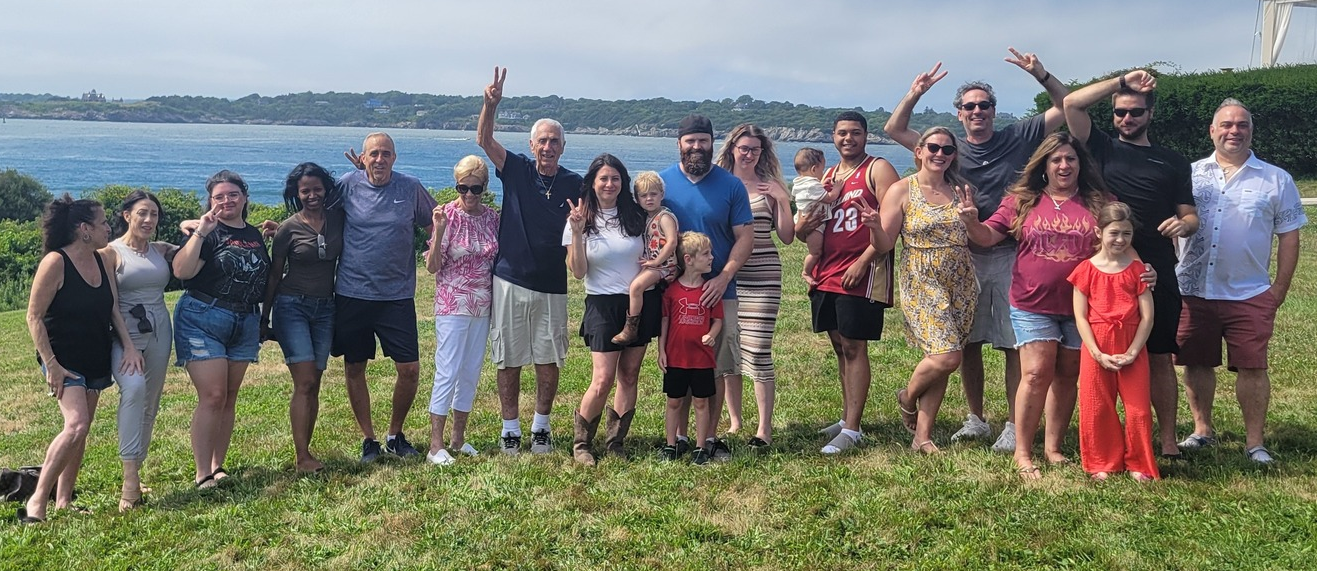
Last month I vacationed with four generations of family for a week in beautiful Newport Rhode Island. This year I got up early and went out on my own rather than waiting for all the late risers. During my morning walkabouts I encountered many species of birds, I am an avid enthusiast. A gift from my mom when I was a child. She never said, “Ronny, look at the bird.” Instead, she’d tell me the name of the bird. She unknowingly did to me what Mr. Miyagi did to the Karate Kid. My favorite morning hike ended at a secluded stone covered beach beneath a large cliff, the chosen landing pad for more sea glass than I’ve seen in one place. My wife had collected a large bag of the washed glass last year and had left it behind, so I decided to catch her up on her collecting.

On another day we all gathered at the beach. My biological mother had passed over twenty years ago; she is the one who taught me about the birds. She gave us an appreciation of the seashore as well. My cousin Jay commented on how my sister Dawn and I were beachcombing together for over an hour without saying a word to each other. The funny thing is we didn’t have to. During that time, in that collection of moments, we were closer than any two siblings could be.

This year I was the designated grille master, a task I was hoping to pass off to my cousins from Maine. In all I did very well with the assistance of my wife who added the cheese to the burgers and some help from my nephew Triston in bringing the burgers to the table. I shot some video after the last burger was off the grille in which I lovingly referred to my dad, the family patriarch as the “Grand Poobah” and my stepmother, our matriarch as the “Grand Poobess”. Video introductions of the rest of my family followed, ending with my eight-month-old grandson Ezme and his camera-shy parents who attempted to escape me.

I put my phone away for the majority of my vacation this year. The absence of the screen seemed to really cleanse my soul and replenish my spirit. I was present in every moment. I didn’t take as many photos as usual, but that’s okay. Others took photos and I have so many great memories etched in my mind. Remember, the past is gone, the future isn’t here yet, all we really have is right now. In that moment before thought is where creation takes place. That’s where God lives.

Winterization

Have My RV Guy prepare your RV for cold weather storage by draining the water system, blowing out the lines, adding antifreeze, and protecting vulnerable components from the elements. Winterization prevents damage from freezing and ensures the RV is ready for use in the spring. Schedule your RV winterization today!

Chepachet Village

by Ron Ash

If you grew up in northern Rhode Island you are no stranger to Chepachet Village, but you may not be familiar with its history. Walking through this quaint community of antique shops one cannot help but to appreciate its rustic charm. The areas history dates far back before the earliest of commercial ventures were imagined. I believe they called them “Trading Posts” back then. What are now The Town Trader and surrounding shops were some of the historic establishments started by those early Americans who saw Glocester as a place for business opportunities during colonial times.

Originally home of many Pequot  and Nipmuc people, Chepachet finds its origin in the language of these native Americans. Chepachet means “where rivers meet”. The Chepachet River flows through Glocester and Burrillville starting at New Pond, flowing north to Gilleran Pond, and eventually joins with the Clear River to Branch River. Obviously the ideal natural infrastructure to facilitate trade between native Americans and the colonists. Have canoe, will travel!

In 1774 Chepachet residents were ready for independence and were not shy about lending their support for the impending revolution. At that time the “Gloucester Light Infantry” was founded in town. The infantry operates an armory museum behind the town hall at 33 Dorr Drive, formerly Chepachet Elementary School. I’ll have to visit there someday. I will be sure to share my findings when I do.

If you walk across the bridge from the Chepachet Post Office (est. 1828) towards the antique shops you’ll find a plaque on the bridge which commemorates “Betty the Fabulous Learned Elephant”. On May 25th 1976 “Elephant Day” was proclaimed in remembrance of the shooting death of said elephant as she crossed the Chepachet River on that date in 1826. “Little Bett” was the victim of a band of undesirables led by a man named Canton Smith. A sad story made worse as Betty was a very popular small circus attraction of the day.

It is easy to miss the historical importance of this beloved town. We get so busy with life we often get tunnel vison and fail to appreciate the history around us. So, while you are on your way to Who Cut The Cheesecake, Uncle Harry’s Barbershop or Depitrillo’s Bakery, please take a moment to recall the early settlers who made Chepachet and the United States of America possible. Historically, the residents of Chepachet were and are not a shy people. Get involved, learn the history and support those who protect and maintain it.

Remember, time is our most precious commodity, spend it wisely.

Happy camping!

Ron Ash aka My RV Guy