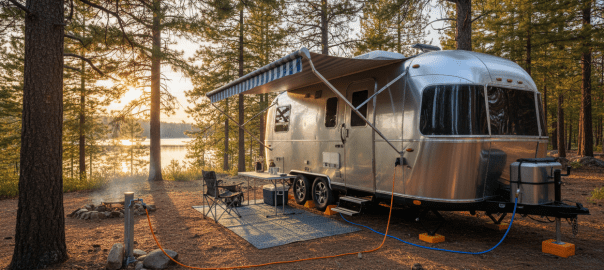
Arriving at a campsite after a long drive is one of the best feelings in the world — but only if your setup goes smoothly. Whether you’re a first-timer or just looking to sharpen your routine, this step-by-step guide will walk you through how to properly set up a travel trailer at a campsite quickly and confidently.
Step 1: Choose and Pull Into Your Site
Before unhitching, take a moment to survey your campsite. Look for a level spot, note where the hookups are (water, electric, sewer), and plan your pull-in angle. Back in slowly — use a spotter if you have one — and position your trailer so the door faces away from the sun or toward your preferred view.
Pro tip: Use your tow vehicle’s backup camera and take it slow. A few extra minutes here saves a lot of frustration later.
Step 2: Chock Your Wheels
Before you do anything else, place wheel chocks on both sides of your tires to prevent any rolling. This is a critical safety step — don’t skip it.
Step 3: Level Your Trailer
A level trailer is essential for comfort, appliance performance (especially the refrigerator), and slide-out operation. Use a bubble level or a leveling app on your phone.
- Side-to-side: Use leveling blocks or ramps under the low-side tires.
- Front-to-back: Adjust your tongue jack up or down until level.
Most modern travel trailers have a built-in level indicator — check your owner’s manual for its location.
Step 4: Unhitch from Your Tow Vehicle
Once level and chocked, you can safely unhitch:
- Lower the tongue jack until it takes the weight off the hitch ball.
- Disconnect the safety chains, brake controller plug, and trailer wiring harness.
- Release the hitch coupler and lift it off the ball.
- Raise the tongue jack fully and pull your tow vehicle forward.
Step 5: Deploy the Stabilizer Jacks
Stabilizer jacks (at the four corners of your trailer) reduce movement and sway when you’re inside. Lower them until they make firm contact with the ground — but don’t use them to level the trailer. That’s what leveling blocks are for.
Step 6: Connect to Shore Power
Plug your 30-amp or 50-amp power cord into the campsite’s electrical pedestal. Make sure the breaker is off before plugging in, then flip it on. Check inside that your outlets and appliances are working.
Note: Always use a surge protector to protect your RV’s electrical system from power fluctuations.
Step 7: Hook Up Water
- Attach a drinking-water-safe hose to the campsite’s water spigot.
- Connect the other end to your trailer’s city water inlet.
- Turn on the spigot slowly and check for leaks at both connections.
Pro tip: Use an inline water pressure regulator (set to 40–60 PSI) to protect your trailer’s plumbing from high campground water pressure.
Step 8: Set Up Sewer (If Full Hookup)
If your site has a sewer connection:
- Connect your sewer hose to the trailer’s drain outlet.
- Place the other end securely in the campsite’s sewer inlet.
- Keep your black tank valve closed until it’s at least two-thirds full — this prevents pyramid plugs.
- You can leave the gray tank valve open to drain continuously.
Step 9: Extend Your Awning & Slide-Outs
With utilities connected and the trailer stable, extend your slide-outs (if equipped) and deploy your awning. Make sure there are no obstructions — tree branches, neighboring rigs, or uneven ground — before extending.
Step 10: Final Walkthrough
Do a quick interior and exterior check:
- Refrigerator switched to electric mode and cooling
- Water heater on (electric or propane)
- Propane tanks open (if using gas appliances)
- Smoke and CO detectors functioning
- All windows and vents opened for airflow
You’re Set Up — Now Enjoy It!
A solid setup routine becomes second nature after a few trips. The key is consistency — do it in the same order every time and you’ll be set up in under 30 minutes. Now kick back, pour a cold drink, and enjoy the outdoors.
Need gear to make your setup easier? Browse our RV accessories collection for leveling blocks, surge protectors, water pressure regulators, and more.
 My RV Guy